You Might Enjoy...

Bacon Wrapped Turkey Spiedini

Day After Thanksgiving Salad & Cranberry Vinaigrette

Maple Marshmallow Creme Filled Whoopie Pies

Check out 30 Days to Easy GF Living!


Gluten Free Global Community


Proud member of FoodBlogs

Entries in Dessert (35)

Sunday
Oct022011

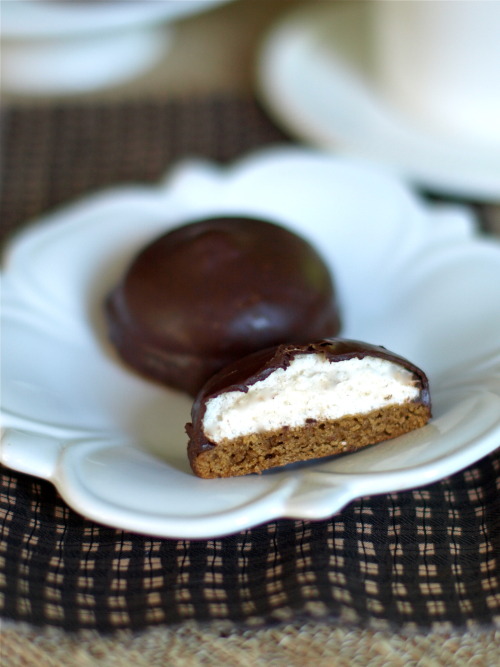
Mallomars or Whippets {Gluten-free}: with a White Wine Kicker

Each year, when the weather turns cool, it’s time to keep a lookout for the bright yellow boxes of Mallomars adorning the end of the aisle at your local grocery store. Boxes and boxes of delightful chocolate covered marshmallowy goodness.

And then they’re gone.

That’s because Mallomars are, according to the NY Times, “The Cookie That Comes Out in the Cold”—a seasonal treat popular mostly in the northeastern part of the US. Well, even more specifically the NY metropolitan area.

For three years now I’ve looked longingly at those yellow boxes. And today, folks, I satisfied my desire. Made my own Mallomars. Or, Whippets (Canada) or Schokokuss (Germany). So there.

There’s one thing—besides being gluten-free—that makes these different from their commercial inspiration—the marshmallow has been jazzed up a bit. (Probably should play this up more because it’s kind of unique.) It’s made with a boiled white wine syrup. While it doesn’t lend a bold flavor to the cookie you will pick up a hint of white grape. Subtle but there—and it makes them a bit more special.

As if they needed anything more to make them special.


Mallomars

Graham Cracker Base

Make one batch of gluten-free Grahams—found here. You will want to keep these cookies plain (not fancy—coated with chocolate).

I rolled the cookies out to about 3/16 inches and cut them with a 1 3/4 inch biscuit cutter that had a nice scalloped edge to it. Just a note: the dough is on the soft side so split into thirds and refrigerate it (at least 60 minutes or even overnight). Take out a third at a time to roll out between two pieces of parchment—leave the remaining dough in the fridge. Be sure to flour the bottom layer of parchment before you roll the dough out. Cut your cookies and remove them to a parchment lined cookie sheet with a flour coated metal spatula. Watch your baking time—these might take a little less time since they’re smaller than the original recipe. I would check at 10 minutes. Also, cookies continue to bake when they come out of the oven. You want these just lightly browned. Cool the cookies completely. You do not want them even slightly warm when you pipe the marshmallow onto them.

White Wine Marshmallow

First of all, if you’re not into the whole white wine marshmallow thing no problem. Here’s a very nice recipe for marshmallow made from either maple syrup or agave that will probably work just fine. Also, I bet you could make this with red wine (an inexpensive sweet wine, like Riunite Lambrusco). I will be trying that for sure!

Make a syrup from the wine. Mix together in a medium saucepan:

750 ML bottle of Riunite Bianco*
1/4 cup sugar

The wine will foam when you add the sugar. Be sure you have a big enough saucepan—the wine should only fill it to the halfway point.

Bring the wine to a boil and immediately lower to a simmer. Continue to simmer until reduced to 1/3 original volume. Remove from the heat and cool until just warm.

Mix together in a glass measuring cup or ceramic bowl:

¾ cup wine syrup
¼ cup agave

Sprinkle with

3 one ounce packages unflavored gelatine

Microwave 30 seconds.

Pour the wine mixture into stand mixer with whisk attachment.

Start on low speed to mix and add:

¼ teaspoon salt

Increase the speed to high (you can tent the mixer to avoid spray).

Mix 10-12 minutes until at least double in volume and holding a peak.

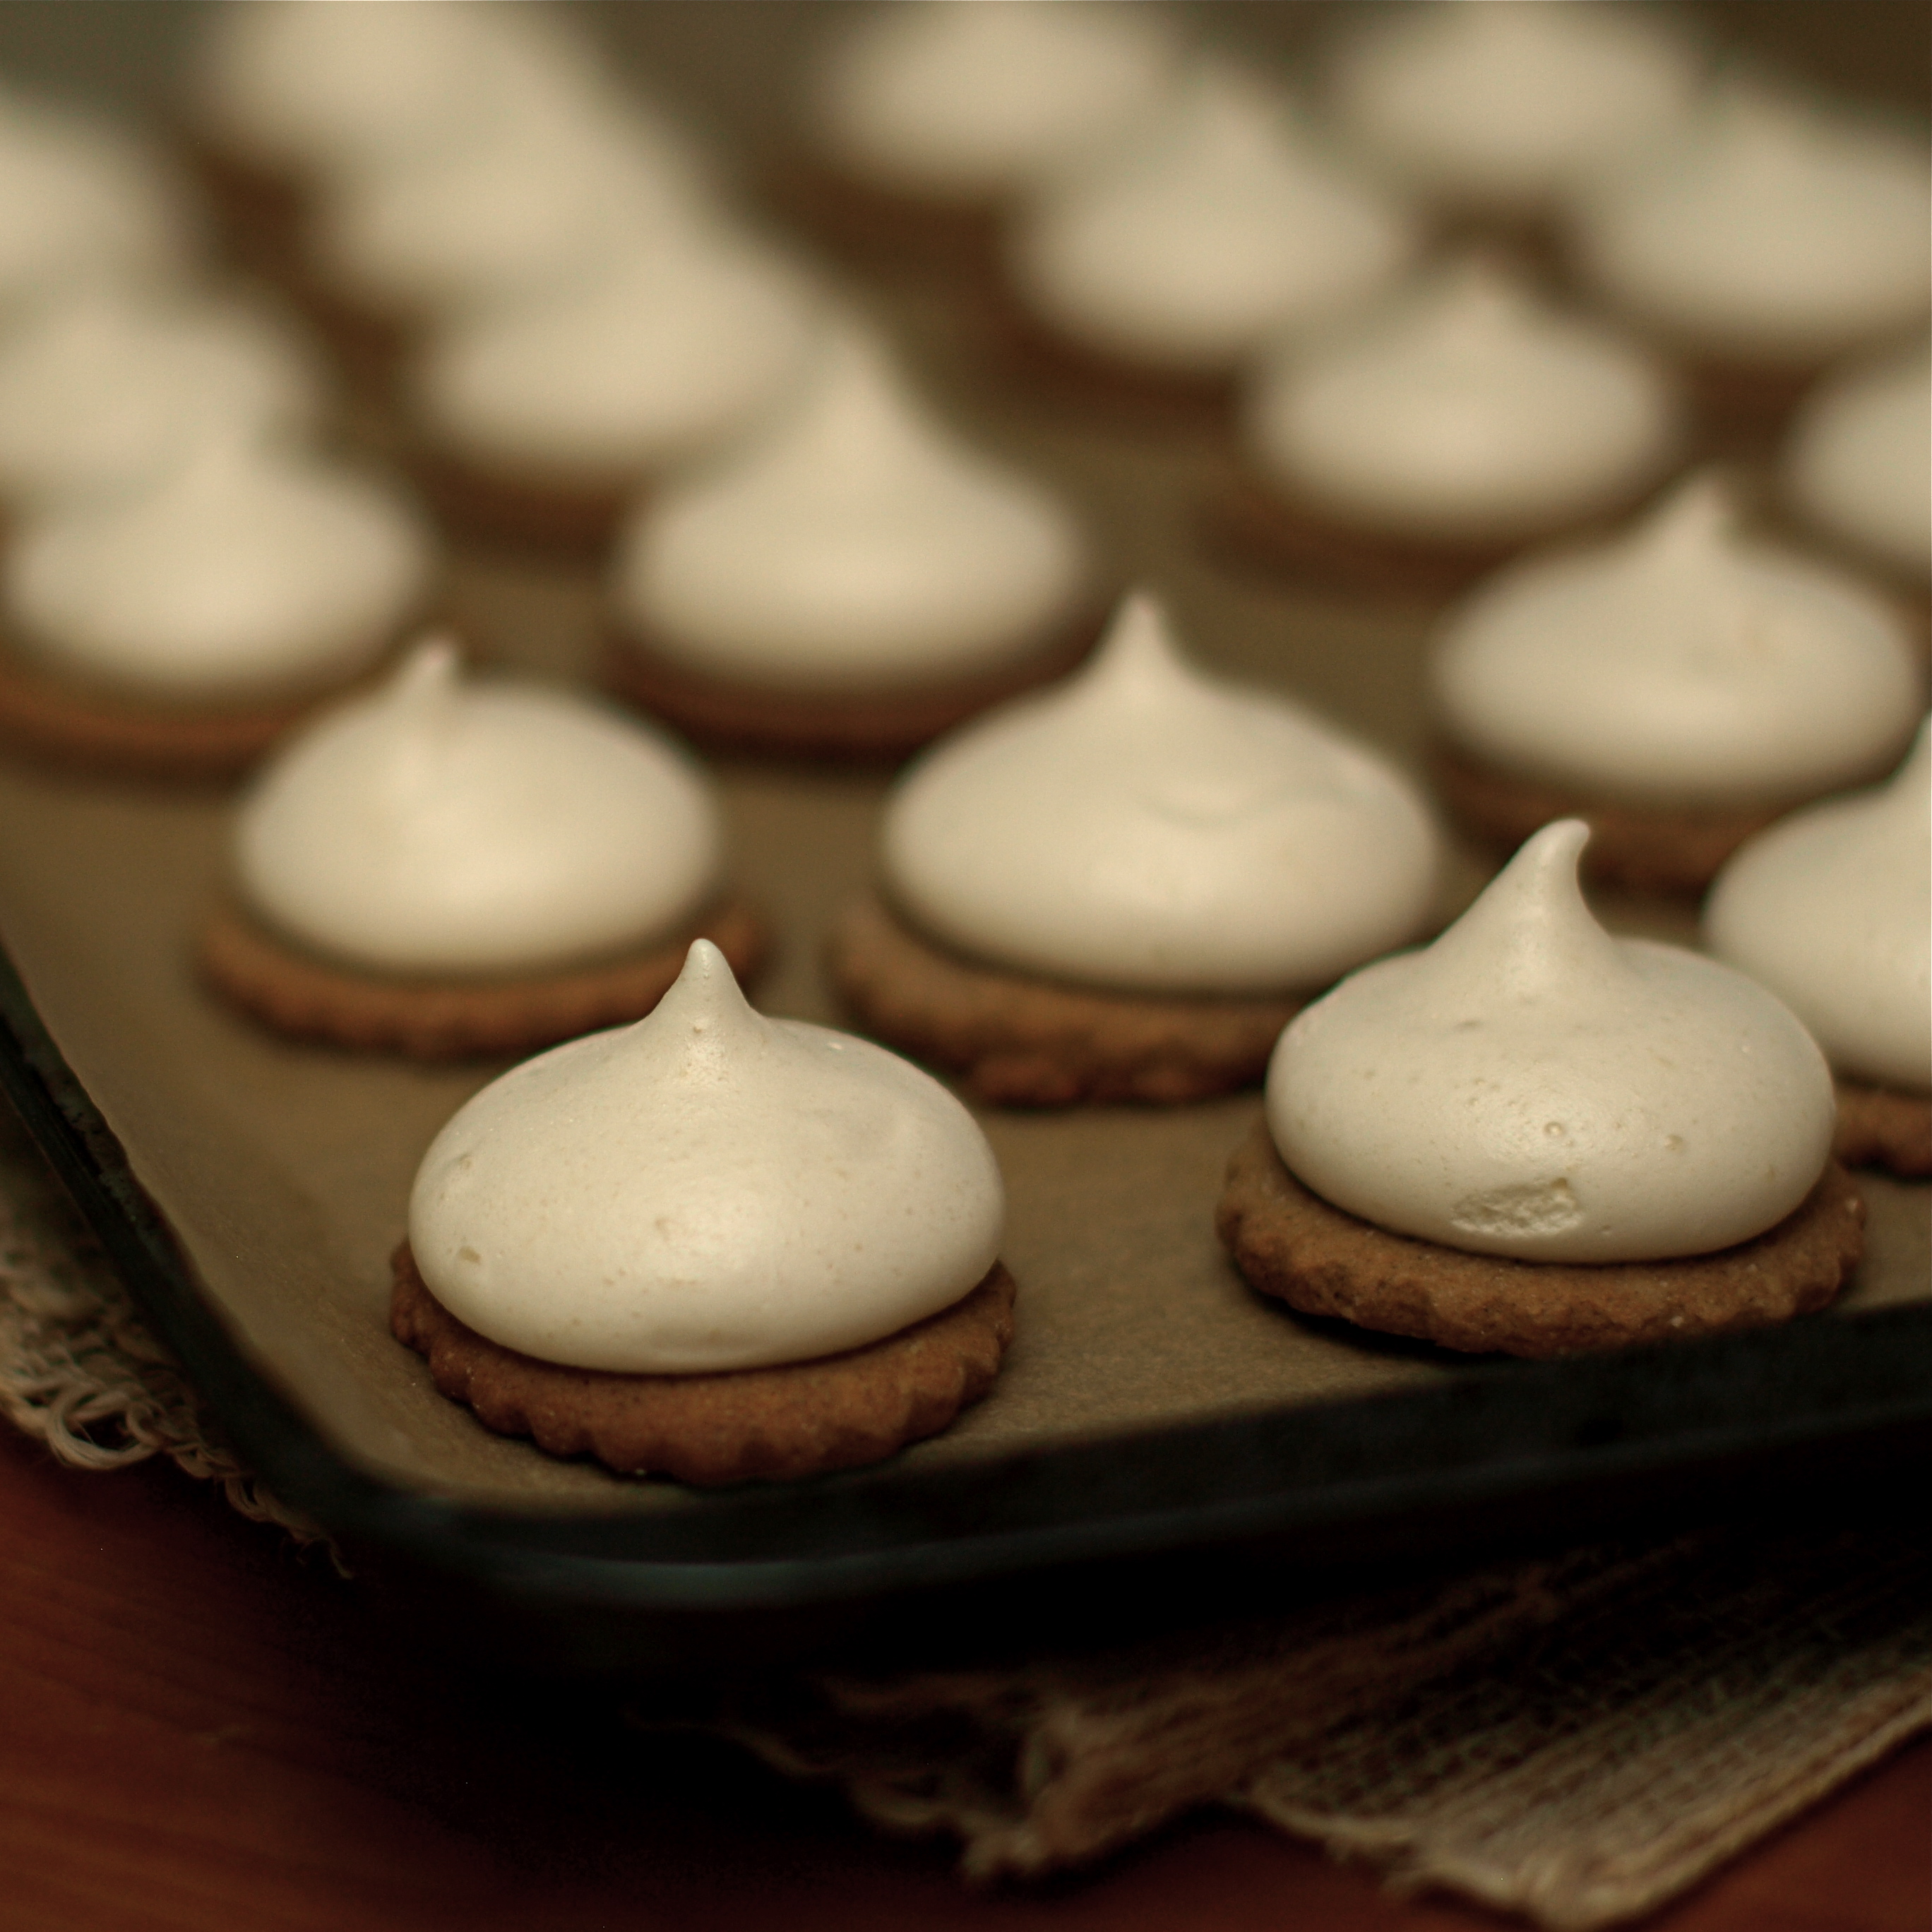
Fill a cake decorating bag equipped with a large tip (I actually just used the coupler) with the marshmallow. (If you don’t have a decorating bag you can use a ziploc bag.) Pipe the marshmallow onto each cookie.

*Go with an inexpensive sweet wine like Riunite—my guess is a dry wine isn’t going to be as successful. But, you might try it and prove me wrong.

Chocolate Coating

Melt (using one of these methods):

One 10 ounce bag Enjoy Life Chocolate Chips

Mix in:

3 tablespoons of melted shortening (measure before you melt)

Assemble

Gently pick up each marshallowy cookie and dip—marshmallow down—into the chocolate up to the cookie. Use a fork to help pull the cookie out of the marshmallow and place on a parchment lined cookie sheet.

Allow to cool. I actually placed the cookies in the freezer for about 15 minutes to set the chocolate better. The chocolate never got quite as hard as a commercial Mallomar.

Makes about two dozen cookies.

PRINT MALLOMAR RECIPE

PRINT GRAHAM COOKIE RECIPE

Wednesday
Jul132011

Fresh Blueberry Pie with Lemon Thyme Crust

Blueberries! They’re in season from June through August. They’re delicious—succulent blue gems eaten fresh off the bush or incorporated into sweet things like blueberry pancakes, blueberry muffins or blueberry pie. They’re good for you—high in antioxidants and anti-inflammatories (which don’t diminish with freezing). These nutrients translate to improved cognition and cardiovascular health for those of us who love to eat blueberries. My freezer is now full with these little beauties!

This year’s summer vacation was one of those stay-at-home types. You know the kind—lounging, day trips, walking on the beach, spending time with each other and the kid, playing with the dogs. Somewhere mid-week my food meanderings landed me on a journey for local organic blueberries. It didn’t take long to locate Emery’s Organic Blueberry Farm in central New Jersey and convince my husband we needed to find this sweet little place. Right. Now.

My intention was not to drag the hubs out into the blueberry fields—I thought we’d just buy a flat of organic blueberries for me and maybe a pie for him. Once there the head lady in charge of the little market brought us outside and declared it was the best day of the year to pick. Other incoming blueberry pickers echoed her  sentiments and before we knew it we were riding in the back of a tractor on the road to harvesting fresh organic blueberries.

It was a spectacular day…sunny, breezy, warm. In no time we’d wandered well into the fields of bushes laden with berries in shades of muted lime green, light blue and that bruised dark purple color that signifies a ripe sweet blueberry. A gentle shake of each clump and ripe berries just fell into our buckets.

Voices of parents locating kids, women discussing the sizes and colors of the berries, and a mom expertly teaching her daughter how to pick the best berries wafted around us as we picked.

While we enjoyed the earthiness of the day we most definitely let our Type A personalities shine through. Everyone else jumped onto the tractor with a few quarts of blueberries. Not us—we had 20 pounds of the little beauties spilling over the tops of our buckets! OK by me. We’ll have organic blueberries tucked away in the freezer for use all fall and winter long.

So, on to blueberry pie. This is the first pie I’ve made since becoming gluten-free. Never really much of a piecrust maker in my previous life the blueberries demanded I try my hand at it—blueberry pie was begging to be  part of my kitchen this weekend. While the piecrust was not the stunning success I’d hoped for—the dough was very tender and wound up being more of a pressed-in affair than a tradtional rolled out crust—the pie turned out spectacular. Cutting the dough into star shapes for the top prettied it up a bit but the winning success was the taste and texture—bursts of sweet berry and a hint of delicate lemon thyme crust. Yep. That’s what I’m talking about.

Fresh Blueberry Pie with Lemon Thyme Crust

Preheat the oven to 400 degrees.

Crust

In a medium bowl whisk together:

1 ¼ cups Authentic Foods Multi Blend gluten free flour
1 cup Honeyville blanched almond flour
1 tablespoon organic cane sugar
½ teaspoon salt

Mix in:

1 teaspoon minced lemon thyme
1 teaspoon lemon zest

Cut into small chunks and mix in with a pastry knife (or two forks) until largest pieces are a bit smaller than a pea:

8 tablespoons (one stick) Earth Balance vegan buttery sticks

Add in the liquids, one tablespoon at a time, mixing between each until all dry ingredients are incorporated and the dough can be gathered into a ball:

1 tablespoon cold lemon juice
5-6 tablespoons cold water (use only as much as is needed to form the dough)

Divide into two balls (one a little larger than the other), place back in the bowl and refrigerate for a least an hour.

Now for the tricky part—managing the dough. Because the dough is tender it’s not hard to roll out but getting it into the pie plate without crumbling is another story. (Next time I may choose to skip the rolling out the dough and instead press it evenly into the pie plate.)

Cut two pieces of parchment paper each about 16 to 18 inches long. Place one down, flour it lightly and place the larger of the two dough balls on top. Sprinkle the dough ball with more flour, lightly coating the entire piece, and place the second sheet of parchment on top.

Working quickly, gently roll out the dough between the two pieces of parchment until it’s about an 1/8 inch thick.  Remove the top piece of parchment, lightly flour the dough and gently spread it across the entire surface with your hands. Gently fold the crust in half using the end of the parchment paper to lift the dough over on itself. Repeat to fold into quarters. Lift the parchment up with the quartered dough and invert it over onto the pie plate with the point in the center of the plate. Remove the parchment and unfold the dough. If the dough breaks don’t be concerned…it presses together nicely with a little pressure.

Place the piecrust in the preheated oven for about 6-8 minutes—it will not be browned.

Roll out the second ball using the parchment method and cut out shapes using small decorative cookie cutters. These will be used to top the cake. (Place these back in the fridge until you’re ready to use.)

Filling

Clean, rinse and place in a large bowl:

6 cups fresh or frozen organic blueberries

Mix together in a separate bowl:

2/3 cup organic cane sugar
6 tablespoons tapioca flour
½ teaspoon salt
½ teaspoon cinnamon
1 tablespoon lemon juice

Gently toss the blueberries with the sugar mixture until well combined.

Place the blueberries is the partially cooked piecrust, top with the decorative piecrust shapes you cut out earlier, and sprinkle with a tablespoon of organic cane sugar.

Cover just the edges of the pie crust with strips of foil to avoid overbrowning of that area. Pop in the oven for 35-40 minutes until the berries are tender. Check halfway through to make sure the decorative pieces aren’t overbrowning—if they are you can tent the pie with a piece of foil.

Here’s a great pie crust making tutorial to check out if you’ve never made one before: All Recipes’ Making a Pie Crust, Step by Step.

PRINT RECIPE

Feast your eyes on some other delicious blueberry recipes:


Roasted Beets with Blueberry Almond Reduction from AndreAnna at Life as a Plate

Rhubarb Blueberry Sherbet from Melissa at Gluten-Free for Good

Lemon Blueberry Muffins from Sea at Book of Yum

Blueberry Banana Buckle from Shirley at GFE